
Follow Me On Social Media!

Quick way to make 3 Chicken breast recipes juicy
Have you ever pulled a chicken breast from the oven or skillet, only to be met with a dry, stringy, and disappointing texture? You’re not alone. The quest for a succulent, flavorful piece of lean protein is a common kitchen challenge. But what if you could unlock the secret to a Chicken breast recipes juicy and tender every single time? The truth is, achieving restaurant-quality results at home is not only possible but often superior, as you control the quality of ingredients and seasoning. Forget the bland, overcooked poultry of your past. Today, we’re mastering the art of creating incredibly moist chicken breast recipes that will become your new weeknight hero.
Table of Contents
Ingredients & Kitchen Tools
For the Chicken & Brine (Optional but Recommended):
- 2 boneless, skinless chicken breasts (about 6-8 oz each), even thickness
- 1/4 cup kosher salt (for dry brine)
- 2 tablespoons olive oil or avocado oil
- 1 teaspoon freshly ground black pepper
- 1 teaspoon garlic powder
- 1 teaspoon smoked paprika (for depth)
For the Pan Sauce (Simple Elegance):
- 2 cloves garlic, minced
- 1/2 cup low-sodium chicken broth
- 1/4 cup dry white wine or additional broth
- 2 tablespoons unsalted butter
- 1 tablespoon fresh lemon juice
- 1 tablespoon fresh herbs (thyme, parsley, or rosemary), chopped
Kitchen Tools You’ll Need:
- Digital meat thermometer (non-negotiable for success!)
- 10-12 inch heavy-bottomed skillet (cast iron or stainless steel)
- Tongs
- Small bowl for seasoning
- Plate for resting cooked chicken
Ingredient Quality Tip: For the best flavor and texture, look for air-chilled chicken breasts if available. They absorb less water, leading to better browning and a more concentrated chicken taste.
Prep Time & Cooking Schedule
Prep Time: 5 minutes (plus optional 1-24 hour brine)
Cook Time: 15 minutes
Total Time: 20 minutes (plus brining)
Yields: 2 servings
Time Management: If you choose to dry-brine, do this step the night before or the morning of cooking—it’s passive prep that pays huge dividends. While the chicken rests after cooking, you’ll quickly whip up the pan sauce in the same skillet.
Step-by-Step Cooking Instructions

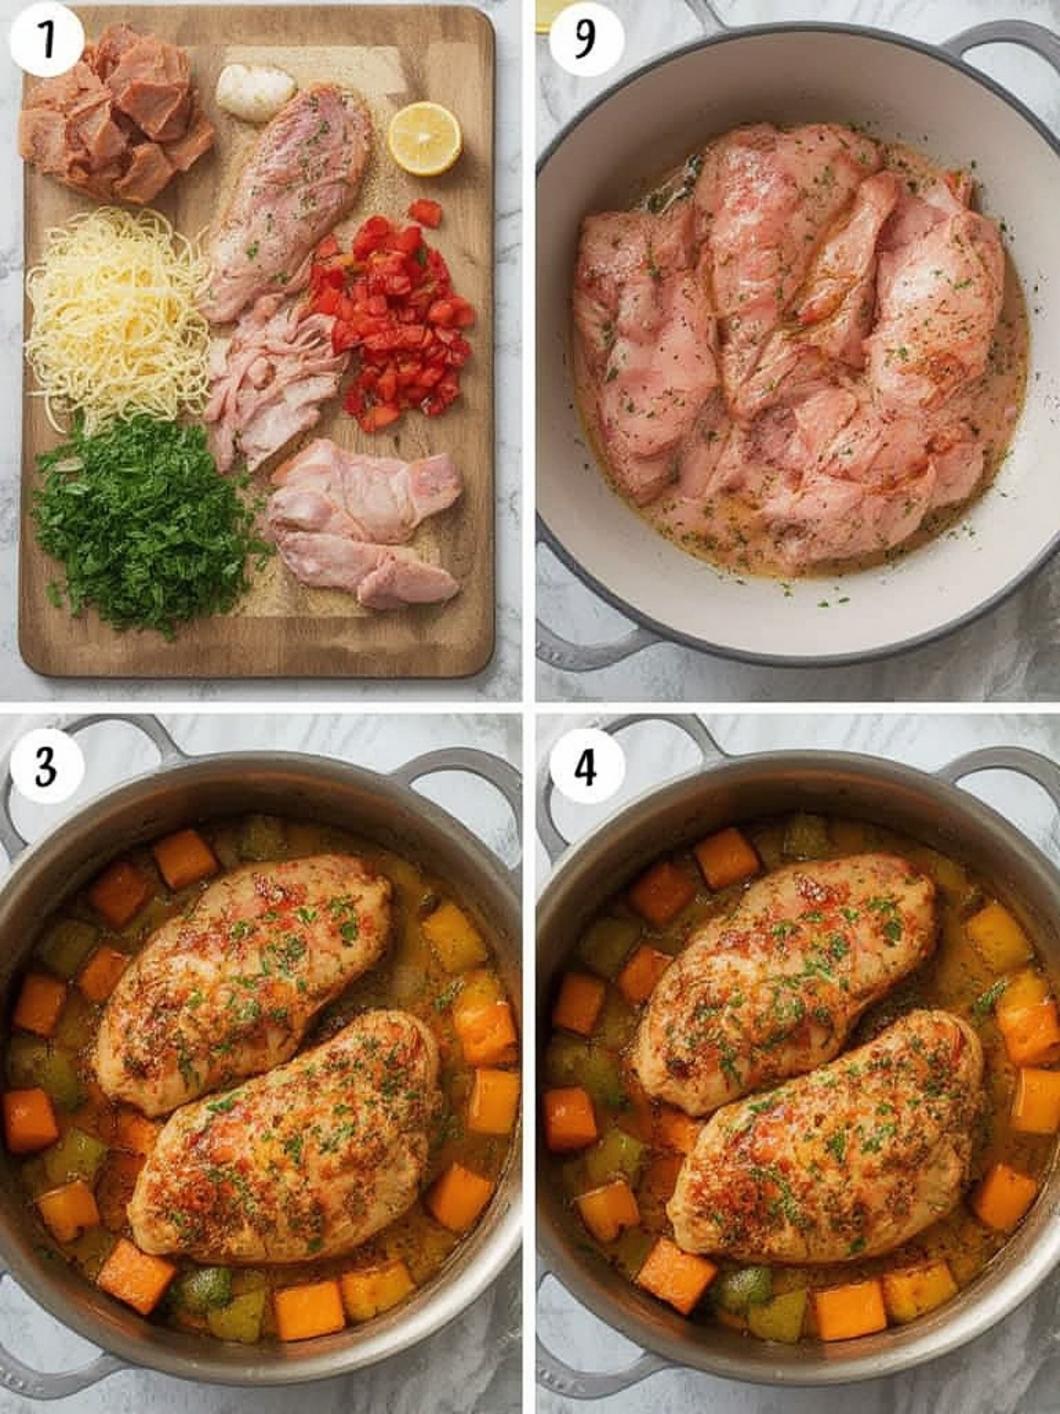
1. Prepare the Chicken: If your chicken breasts are uneven, place them between two sheets of plastic wrap and gently pound the thicker end with a rolling pin or pan until they are an even ¾-inch thickness. This ensures even cooking. Pat them very dry with paper towels—this is crucial for a golden sear.
2. Season Generously: Drizzle with oil and rub to coat. Combine pepper, garlic powder, and paprika. Sprinkle evenly over both sides of the chicken, pressing the seasoning in.
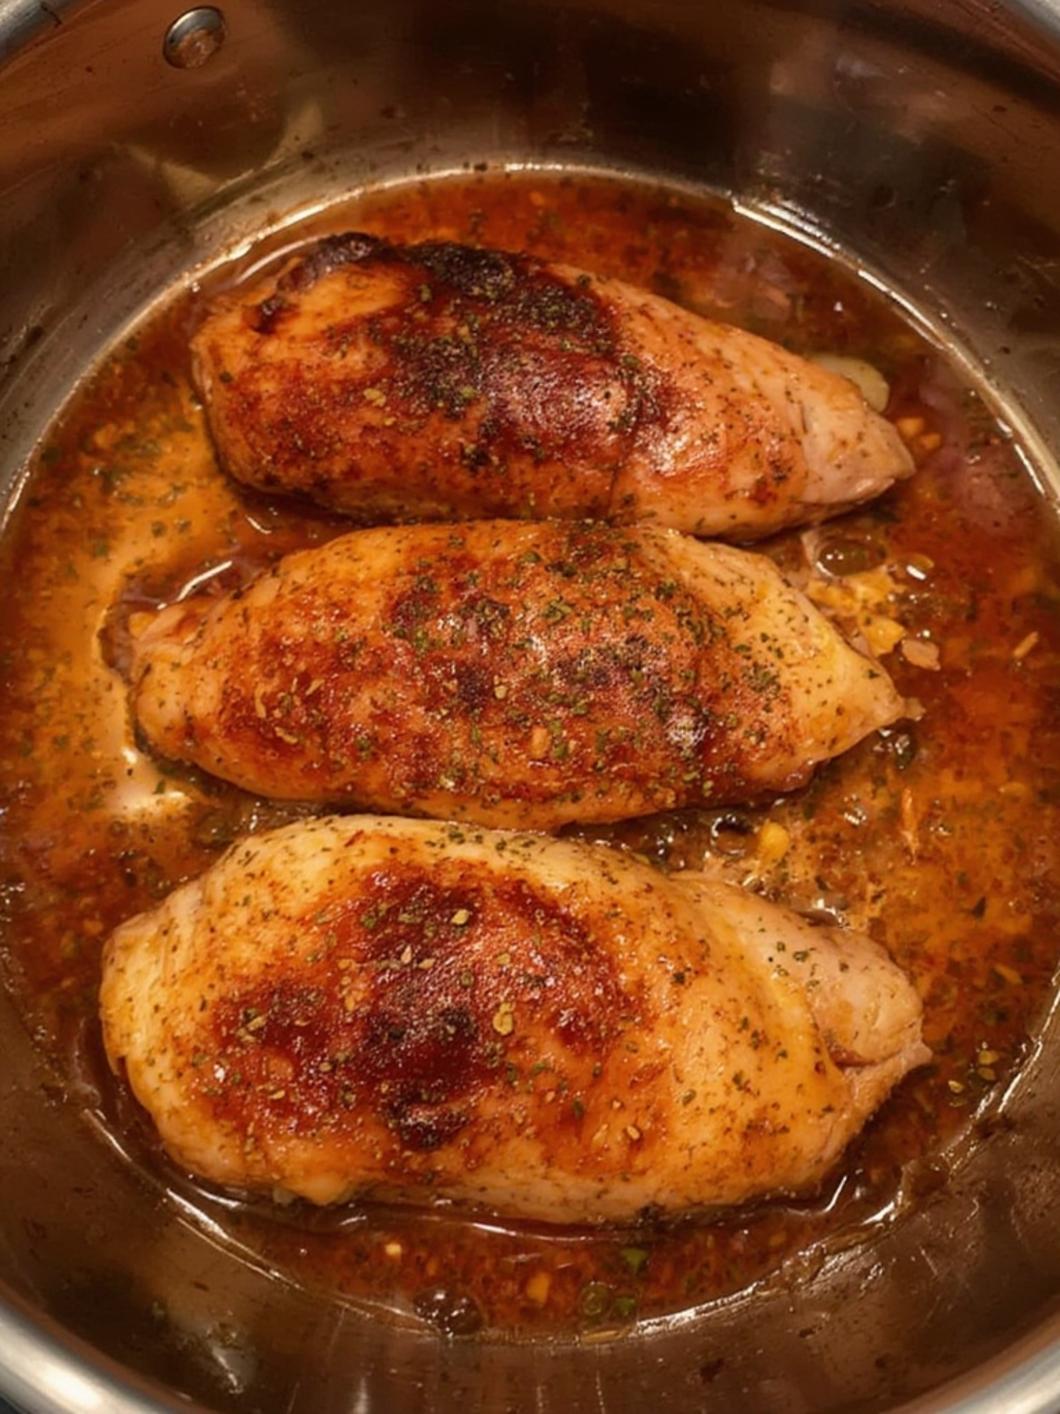
3. Preheat & Sear: Heat your skillet over medium-high heat until a drop of water sizzles and evaporates instantly. Add the chicken. It should sizzle loudly. Cook, undisturbed, for 5-7 minutes until a deep golden-brown crust forms. This initial sear locks in juices, a fundamental step for any Chicken breast recipes juicy masterpiece.
4. Flip & Finish Cooking: Flip the chicken using tongs. Reduce heat to medium. Cook for another 5-7 minutes, or until the internal temperature at the thickest part reaches 155-160°F (68-71°C). The key to moist chicken breast recipes is removing the meat from heat before it hits 165°F, as carryover cooking will raise the temperature another 5-10 degrees.
5. Rest Imperatively: Transfer the chicken to a clean plate, tent loosely with foil, and let it rest for 5-10 minutes. This allows the juices to redistribute throughout the meat, guaranteeing a succulent slice with every cut.
Nutritional Benefits & Health Info
Chicken breast is a powerhouse of lean protein, essential for muscle repair, satiety, and a healthy metabolism. This recipe is naturally low-carb and gluten-free. Using minimal added fats and controlling the sodium in your broth makes it heart-healthy. The herbs and spices provide antioxidants without extra calories, making this a perfect centerpiece for weight management or fitness-focused diets.
Variations, Substitutions & Chef’s Tips
- Make it Creamy: After making the pan sauce, stir in 1/4 cup of heavy cream or full-fat coconut milk for a luxurious texture.
- Dairy-Free: Substitute the butter in the pan sauce with a tablespoon of olive oil.
- Air Fryer Method: Cook at 375°F (190°C) for 12-15 minutes, flipping halfway, until 160°F internal temp.
Herb Garden Twist: Use a herbes de Provence* blend or fresh dill for a completely different flavor profile.
- Chef’s Tip: For an even more tender result, soak the chicken in a buttermilk brine (1 cup buttermilk + seasonings) for 4-12 hours before cooking.
Common Cooking Mistakes to Avoid
1. Skipping the Dry Step: Adding wet chicken to a pan steams it instead of searing it. Always pat dry.
2. Crowding the Pan: This drops the skillet’s temperature, leading to gray, boiled chicken. Cook in batches if necessary.
3. Constant Flipping/Pressing: Let the sear develop! Flipping too often prevents browning, and pressing with a spatula squeezes out precious juices.
4. Cooking to 165°F in the Pan: As mentioned, this leads to overcooked, dry meat. Use a thermometer and trust the carryover cooking during the rest.
5. Skipping the Rest: Cutting in immediately sends all the flavorful juices onto the cutting board instead of staying in the meat.
Serving & Storage Suggestions
Serving: Slice the rested chicken against the grain and drizzle with the pan sauce. Serve over:
- Creamy mashed potatoes or cauliflower mash
- A bed of quinoa or rice pilaf
- A vibrant salad with a sharp vinaigrette
- Roasted seasonal vegetables like asparagus or broccoli
Storage: Store leftover chicken in an airtight container in the refrigerator for up to 3-4 days. For best reheating, use a gentle method: place in a covered skillet with a splash of broth over low heat until warmed through, or use the microwave at 50% power in short bursts.
Conclusion
Mastering this simple technique transforms the humble chicken breast from a feared foe into a reliable, delicious staple. With the right steps—proper searing, precise temperature control, and patient resting—you can consistently create a Chicken breast recipes juicy and full of flavor. Say goodbye to dry poultry and hello to the confidence that comes with perfecting these moist chicken breast recipes. We’d love to hear about your success! Share your photos, variations, or questions in the comments below. Happy cooking!
FAQs
Q: Can I use frozen chicken breasts?
A: Yes, but always thaw completely in the refrigerator first. Pat them extra dry, as frozen chicken releases more moisture.
Q: My chicken is still pink near the bone (if using bone-in). Is it safe?
A: Color is not a reliable indicator. Always use a digital thermometer. The safe temperature for chicken is 165°F, but you can remove it at 160°F as it will continue to rise.
Q: What if I don’t have a meat thermometer?
A: While highly discouraged, you can make a small cut in the thickest part. The juices should run clear, not pink. However, investing in a $10 instant-read thermometer is the single best way to guarantee perfect results.
Q: Can I make this recipe ahead of time?
A: You can season the chicken and store it covered in the fridge for up to 24 hours before cooking. The cooked chicken also reheats well for meal prep.
Q: Is dry brining better than wet brining?
A: Dry brining (salting in advance) is often preferred for chicken breasts as it draws out moisture, which is then reabsorbed with the salt, seasoning the meat deeply and helping the skin (if present) get crispier, without making the surface wet.